Saturday, July 27, 2013

Clothes Line Activity

Although this activity did take a while to make, it ended up being so much fun for the kids and I know they will enjoy playing with this activity quite often. Bean loved using the clothes pins to hang up the clothes, but after a while she decided to play with her dolls instead. Munchkin, on the other hand, sat there and played with this set up for over an hour! He really loved pinning up the clothes. We did a few simple activities with this, like naming the different types of clothes (shirt, pants, skirt and socks), sorting by colour or by type of clothes and seeing if they could make a pattern on the clothesline (sock, pant, sock, pant, sock, etc.). 

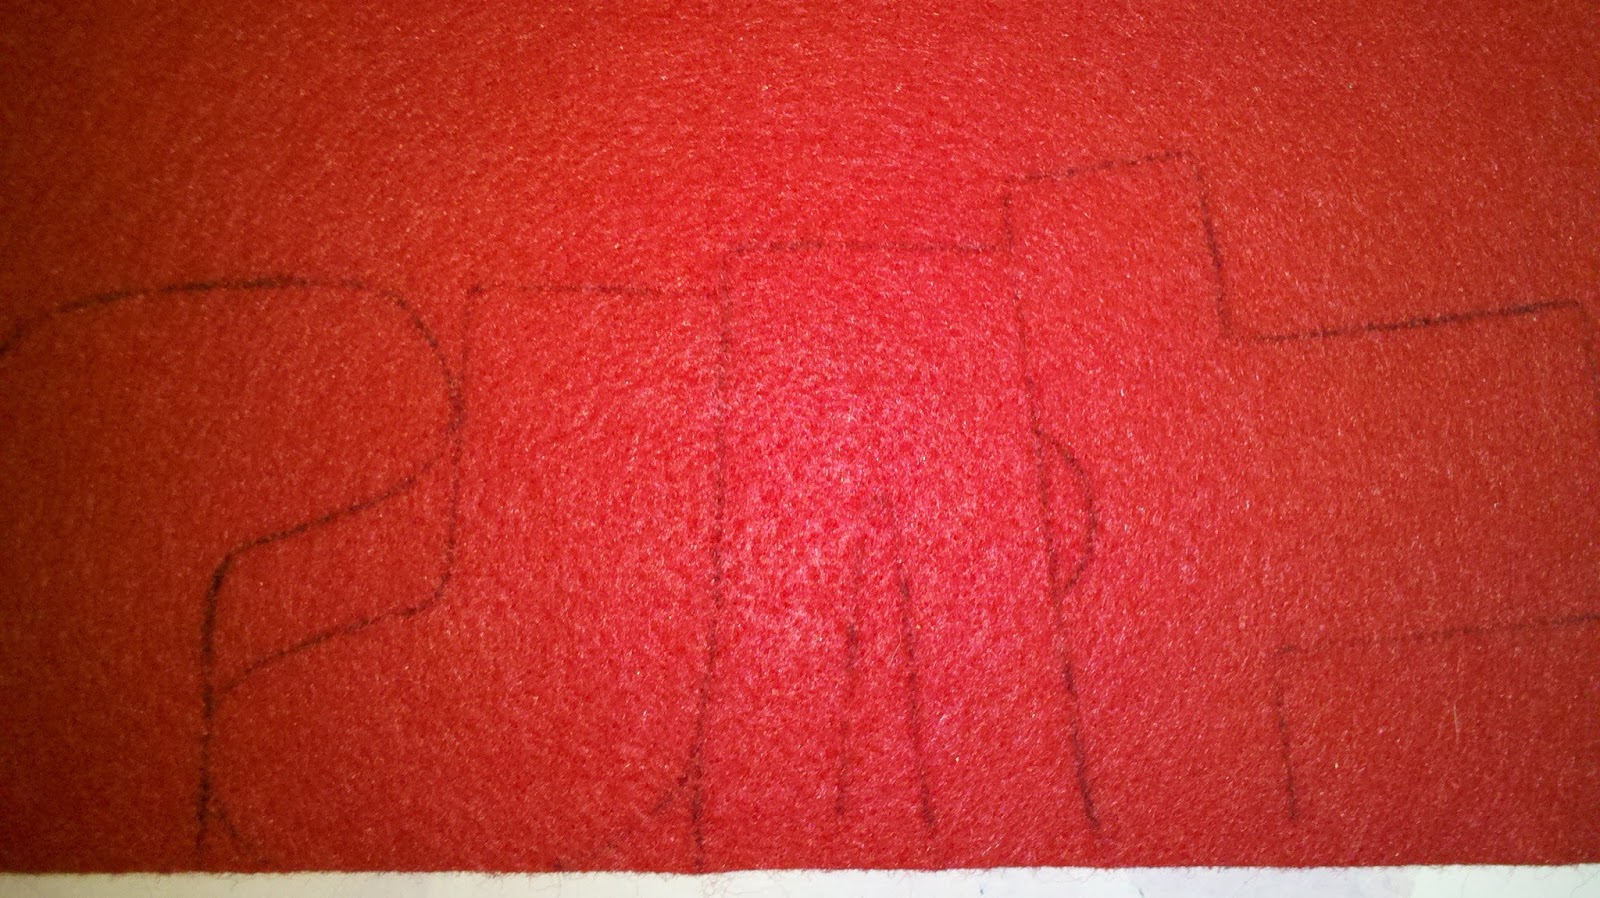
I cut a couple clothes shapes out of a sheet of felt. I tried to line them up to waste less of the felt (although we do save the scraps because you never know what you will use them for). I did this with five different colours and it took about a half hour to cut them all out. 


Once they were all cut up, I put the felt clothes in a little "laundry basket" and put a handful of small clothes pins in a recycled container. Then I tied two strings between the bars of our magazine stand (which we use for library books). The clothes line was ready!


I showed the kids how to use the clothes pins and then I stood back to let them try. They learned very quickly and soon they were quite engaged with the activity.


Munchkin especially liked this activity and was very focused. He made sure each piece of clothes was carefully pinned up.


Bean took her time going through the clothes and only pinned up the ones she wanted (the pants).


Each piece of clothes had to be secured with two pins.


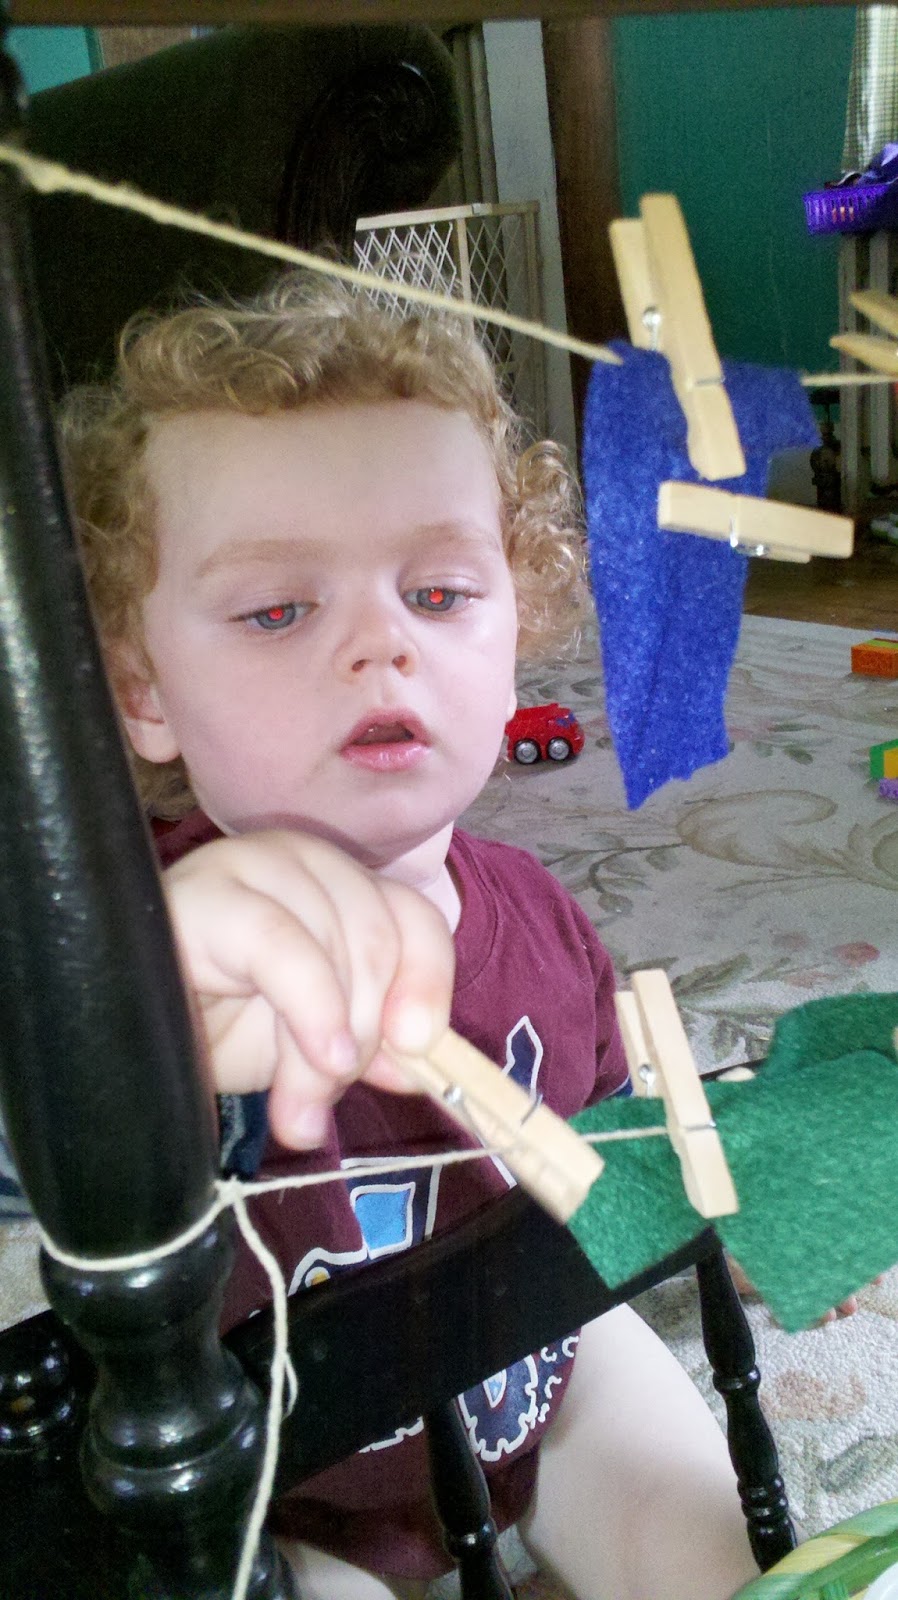
Even pinning just the clothes was fun. :)


Bean lost interest after a while and then came back when she discovered that she could hang up her dolls clothes.


Munchkin also enjoyed using just the pins without any clothes. He liked seeing how many he could line up and was disappointed when he ran out.


{If you enjoyed this post, please consider following me on Facebook and Pinterest. Thank you!}

Friday, July 26, 2013

Indoor Pool Time

Two things we like to do with our blow-up pool inside:  fill it with balls to make a ball pit or fill it with blankets and pillows and use it as a special reading spot. At some point I plan on buying a hula hoop and sewing a blanket around it to make a tent (Pinterest idea). Needless to say, the fun pools can bring doesn't have to all happen outside! So if you have a spare pool, bring it inside and let your kids enjoy playing in it. :)


To make things easier, I gave them one of the couch cushions for their pillow, but sometimes we also use throw pillows. I put a sheet in the bottom of the pool and then gave them two small blankets. Then the kids picked out a few books and jumped right in.


They enjoyed looking through their favourite board books while I prepped lunch. Bean read the alphabet out loud and Munchkin said "beep beep" while he looked through The Little Blue Truck book.


Turns out the pool can also be used as a race track. Bean and Munchkin drove their little cars around the rim of the pool and would make them bounce around and fall off.


One thing we want to try is letting them paint in the pool. Which would certainly make clean-up easier. :)

{If you enjoyed this post, please consider following me on Facebook and Pinterest. Thank you!}

Making Fossils

We love everything dinosaurs at our house. We especially love our dinosaur digs, when we go searching for fossils. We normally use salt dough for fossils, but this time we tried out plaster of Paris. In the future, I will use containers that are much easier to get plaster out of because it was pretty hard to get the fossils out of the white containers. We still managed and they came out fine but they had a few rough edges. 

Our box of Plaster of Paris instructed us to use a 1:1 ratio. We used 1 cup of Plaster of Paris powder and 1 cup of water and that made 3 bowl sized and 4 small bowl sized molds. I may experiment with the recipe later to see if I can make one that is more durable, and I'll make them thicker. These were fine for a first time and the kids enjoyed painting them afterwards. However, we learned the hard way that they break easily. Bean was moving one of the bigger ones and dropped it on the table and it split apart. 

To start, pick out the containers you are using for a mold (slanted sides made it easier for us to remove ours), but I believe silicone would work best. Then pick out the items you will be using (we chose a few shells, a scorpion, a lizard, a small dinosaur and 3 big dinosaurs. 


We used Crayola Model Magic to create the mold shapes. We pressed a small amount into the bowls and then pressed the items into it. When we were satisfied with the detail of the pressings, we moved on to the next one until they were all finished. Just keep in mind that the Model Magic will leak colour onto your mold, so if you don't want any colour sticking to your fossil, use white Model Magic air-dry clay. We actually wanted it to add colour to our fossils, that's why we went ahead and used a couple different colours.


Then I mixed the water and Plaster of Paris together and poured them into the molds. The box instructed us to wait a half hour to allow them to set before removing them.


After we removed them, I let them sit out for an additional 24 hours. 


The detail on some of these are pretty amazing!


This is the one that broke when Bean was helping me transfer them from the bowls to the tray.


The next day I set the tray out and let Bean explore them. She felt each fossil and named the ones she recognized. Then we found the dinosaur bones that matched and played games comparing them. We also talked about how the shells and lizard and scorpion managed to become fossils.


I let them add paint and glitter to their fossils, but Bean didn't want too much paint on them.


{If you enjoyed this post, please consider following me on Facebook and Pinterest. Thank you!}


Thursday, July 25, 2013

Button Snake

I found the idea for making button snakes over at Happy Hooligans. She used felt squares for her snake, and we did too for the first button snake we made. Since then we have also made fabric squares and foam shapes. The felt squares definitely worked the best, but we like that the foam sheets and fabric squares are a bit more difficult. This is a great activity to promote fine motor development and buttoning skills. 

To make a button snake, all you need is a ribbon, two buttons, and whatever material you feel like adding to the button snake. Just keep in mind that when you cut the felt/fabric/foam you need to make sure there is enough wiggle room for the ribbon to fit through. 

I used small foam sheets and cut each one into 9 squares. 


When I finished cutting them up, I stacked them up and measured a few different ribbons against them. I chose one that was about half as wide as the foam sheets.


Then I divided the squares in half (three of each colour) and cut one pile diagonally and the other horizontally.


For my toddler son, felt was definitely the best option, because this is what happened when he tried to use the button snake with the foam squares. I didn't fret too much because I knew we'd just end up using those pieces as scraps for something in the future. But I also didn't want to leave him out while his sister enjoyed playing with the button snake, so I limited him to 10 squares. He did manage to get four out of the ten onto the button snake, so I see that as a success!


Bean definitely liked the challenge of having to carefully add the foam squares to the button ribbon. When she finished putting them all on, she held up the button snake like a trophy and proudly showed me her work. But like I said before, felt works best and we only used foam sheets to add a texture challenge to the activity. To make it more fun, we have also tried using a couple of each different material.


{If you enjoyed this post, please consider following me on Facebook and Pinterest. Thank you!}

Frozen in Ice

If you haven't tried freezing baking soda, I definitely suggest trying it! It has been so fun to play with at our house. We have tried frozen fizzy cubes, a frozen dinosaur excavation and an arctic small world. Each of these have been so fun and we keep revisiting them every few days because they are perfect for hot days! 

I can't wait to try freezing mammoths when we discover prehistoric creatures later this summer. To prepare them for an activity like that, I decided to start by freezing other creatures first and our finale will be mammoths frozen in ice. Before setting this sensory bin up, Bean and I read some books about sudden climate changes and what happens when something freezes. In the past, there have been several areas around the world that had been tropical climates before experiencing an ice age or just a sudden freeze that caught the creatures that lived there by surprise. So that was our theme for this activity!

I let Bean pick out the creatures she wanted to add, which ended up being a couple snakes and lizards. I filled a tall, round container half-way with baking soda and then poured 2 cups of water over it. I knew some of the baking soda would settle at the bottom, so I added the extra water to show that there were two densities in this block of ice. I let Bean stir it up and add the creatures, then we froze it. Because they were cold-blooded creatures, they were not able to adapt to the cold and were unfortunately frozen in ice. 


The day we decided to do this activity, their step-brothers were over, so I made sure the kids shared and took turns using the "hot and cold" water to melt the ice (which was actually coloured vinegar mixed with water in icing bottles - we used red for hot and blue for cold so they could see the difference). As you can see in the pictures below, the red water melted the thick ice at the top while the blue water barely effected the ice. It was a great way to show how different temperatures of water effect ice.


The two layers of ice melted at different rates. The lower, less dense ice melted much faster (also because it had a higher concentration of baking soda), while the top layer was much harder to melt. But after some time and much diligence, they managed to melt away enough of the ice to start seeing what was trapped inside.


I gave them some small sponge scraps to use. They used them to soak up vinegar and squeeze it onto the ice, scoop up baking soda that had settled under the vinegar water and to scrape the baking soda off the chunk of ice and creatures.


Even little S had fun playing in this sensory bin! His mum made sure he didn't put anything into his mouth, but he did try tasting the vinegar. He made a funny puckered face look and then continued playing.


The smell of vinegar doesn't effect us and we haven't had any sensitive skin issues. But if it bothers you or your little ones, you can try adding in a few drops of skin-safe essential oils to mask the smell.

{If you enjoyed this post, please consider following me on Facebook and Pinterest. Thank you!}

Tuesday, July 23, 2013

Oobleck Swamp

We did a bit of a swamp exploration this week, starting with our edible swamp sensory bin, which was so much fun and was pretty tasty too! Now we explored an oobleck swamp, which is as much fun but not as tasty. We will end our swamp exploration with another sensory bin that will be posted later this week. Bean is especially enjoying learning about this mucky environment that is home to all sorts of creepy crawlies. 

To start it off, I placed a few paper towels on the coffee table (when the oobleck spills on the coffee table it hardens and is harder to clean off, but it balls up on the paper towels and peels right off) and a styrofoam tray with some lizards, snakes, frogs and alligators. While I was in the kitchen preparing our swamp, Bean sat with Munchkin and looked through some pictures of swamps in a book. She correctly matched up the creatures to the ones in the book and we talked a bit about swamp habitats and what creatures live there. Then I brought out the pan of oobleck... I had decided to add two different shades of green food colouring and a few drops of black food colouring and I'm so glad I did! It looked so fantastic and Bean exclaimed, "oh my god, it's a swamp!" 


Like any regular oobleck, this stuff was amazing! Liquid and solid rolled into one, being a rebel and breaking the laws of Newtonian fluids. It never fails to amaze and delight them.


The dark and light greens swirling around in the gray muck was just fantastic! It really did look like a swamp and we talked about what the greens and grays could be. Like, the dark green area was where lots of algae lived and the gray area was where the water was deeper and more murky. And just like real swamp goop, it stuck to your skin!


The blend of greens and gray were just amazing! The kids loved swirling the colours around and popped any bubbles that formed. Eventually the colours did blend together, but it was still so fun to play in!


Munchkin really enjoyed sticking the lizards into the swamp goo and holding them up to show me. Bean enjoyed letting goop slide off her hands into the pan.


And despite all the food colouring, their hands were barely stained and it came right off with some soap and warm water.


My favourite part was when they finally added the alligators. Bean placed them in the swamp and told me they were waiting for their prey. And like real alligators, they were very patient and waited. And waited. And waited. And finally when I thought they had forgotten about the alligators, they lunged at a nearby lizard and took him down into the depths of the swamp. Munchkin made sure the lizard stayed there and then proceeded to sink the rest of the lizards.


Eventually most of the swamp creatures were sunk or eaten or were just swimming around peacefully (the frogs). The kids barely noticed how much time went by, because by the time we cleaned up it had already been just over two hours.


Activities like this are just so much fun and I hope you enjoy it too if you ever create your own oobleck swamp!


{If you enjoyed this post, please consider following me on Facebook and Pinterest. Thank you!}

Related Posts Plugin for WordPress, Blogger...