

For regular fabric, you can just fold it into quarters and trim. But since felt is much thicker, you just can't do that.


For the flowers, I created wet-felted balls in various colors and sizes. It was my first attempt at wet felting and I'm pleased with the way they came out!

She mentioned that she liked the "grass" trim she saw on some of my other felt play mats. She said the play mat would be used by 3 year olds, so with that in mind I glued the yarn to the felt with fabric glue . The bond is flexible, permanent and washable, so that means that the individual treads can't be pulled out.

I set up the felt balls on little green cut outs that were supposed to be leaves. I simply cut out 1" squares and then trimmed them down to four leaves.

I stitched the felt balls onto the leaves using embroidery thread .
.


I created a dirt mound using cobblestone embossed felt . It's perfect for "construction site" areas on felt play mats. I used a matching shade of brown felt for the dirt road. I filled the mound with poly-pellets
 . It created an interesting sensory spot for the play mat. Cars and trucks can easily drive over the mound and move the pellets around, giving a neat sensation for driving through something.

Then I added two driveways and flower beds. The driveways are the perfect size for matchbox cars. The area around the driveways was a bit small, but we were able to create two "houses" using blocks next to the driveways. So it worked out. The alternative would have been to put the lake where the driveways were, but she had asked for the lake to be in the middle. There's enough room next to the lake for more block houses.

So for the flowers, I stitched them through the felt, but I didn't think tying them off would have been a strong enough hold. I glued the underside of the flowers to the felt, and then I cut the threads to about an inch on the back. I folded them into a circle directly under the flowers and glued them in place. Always be sure to let the glue set for at least 12 hours (24 preferably) before moving anything around.


So for the mound, I had originally sewn a pouch for the poly-pellets. However, right before I sewed the back to the mat, I unstitched the mound and pulled the pouch out. Why? Because the pouch was restricting the pellets from fully moving around. I probably could have made a larger pouch, but the stitching was close enough that I don't think any pellets will pop out. I much prefer the change.


The hardest part was being patient for all the glue to dry. Gluing the grass to the underside of the streets was a bit time consuming, but sewing through it was harder. It wasn't too bad though, so I'll probably do it again.

I really like the way it came out!

The mound isn't too tall, mainly because if it had been filled any more, the play mat wouldn't have laid flat. However, it's plenty big enough for some construction trucks to drive around on it.

I did trim the grass a 1/2". It was looking a little wild before. There is a sandy brown area around the lake, and grass around the lake. There's a small cleared patch, too, for swimmers.


And it wasn't part of the play mat purchase, but I added a couple of sewn felt rocks (6 colors, 3 shades of grey and 3 shades of brown) and needle felted logs. There's even a hollow log for animals to hide in! I always add a little something extra to my Etsy orders. I think it's a nice surprise and hopefully no one minds. :) This play mat was meant for a preschool classroom, so I think the rocks and logs will add to the fun of playing with it!

Disclosure: This post contains affiliate links for your convenience.
So I ended up printing out 4 copies of the pattern and taped it up. Then I pinned it to the piece of felt
 and cut along the edge. I just picked up a new pair of Fiskars fabric scissors
 , and boy does it make a huge difference! The cut is so much neater and there's less fray. However, the downside is that I have small hands, and those scissors feel huge!
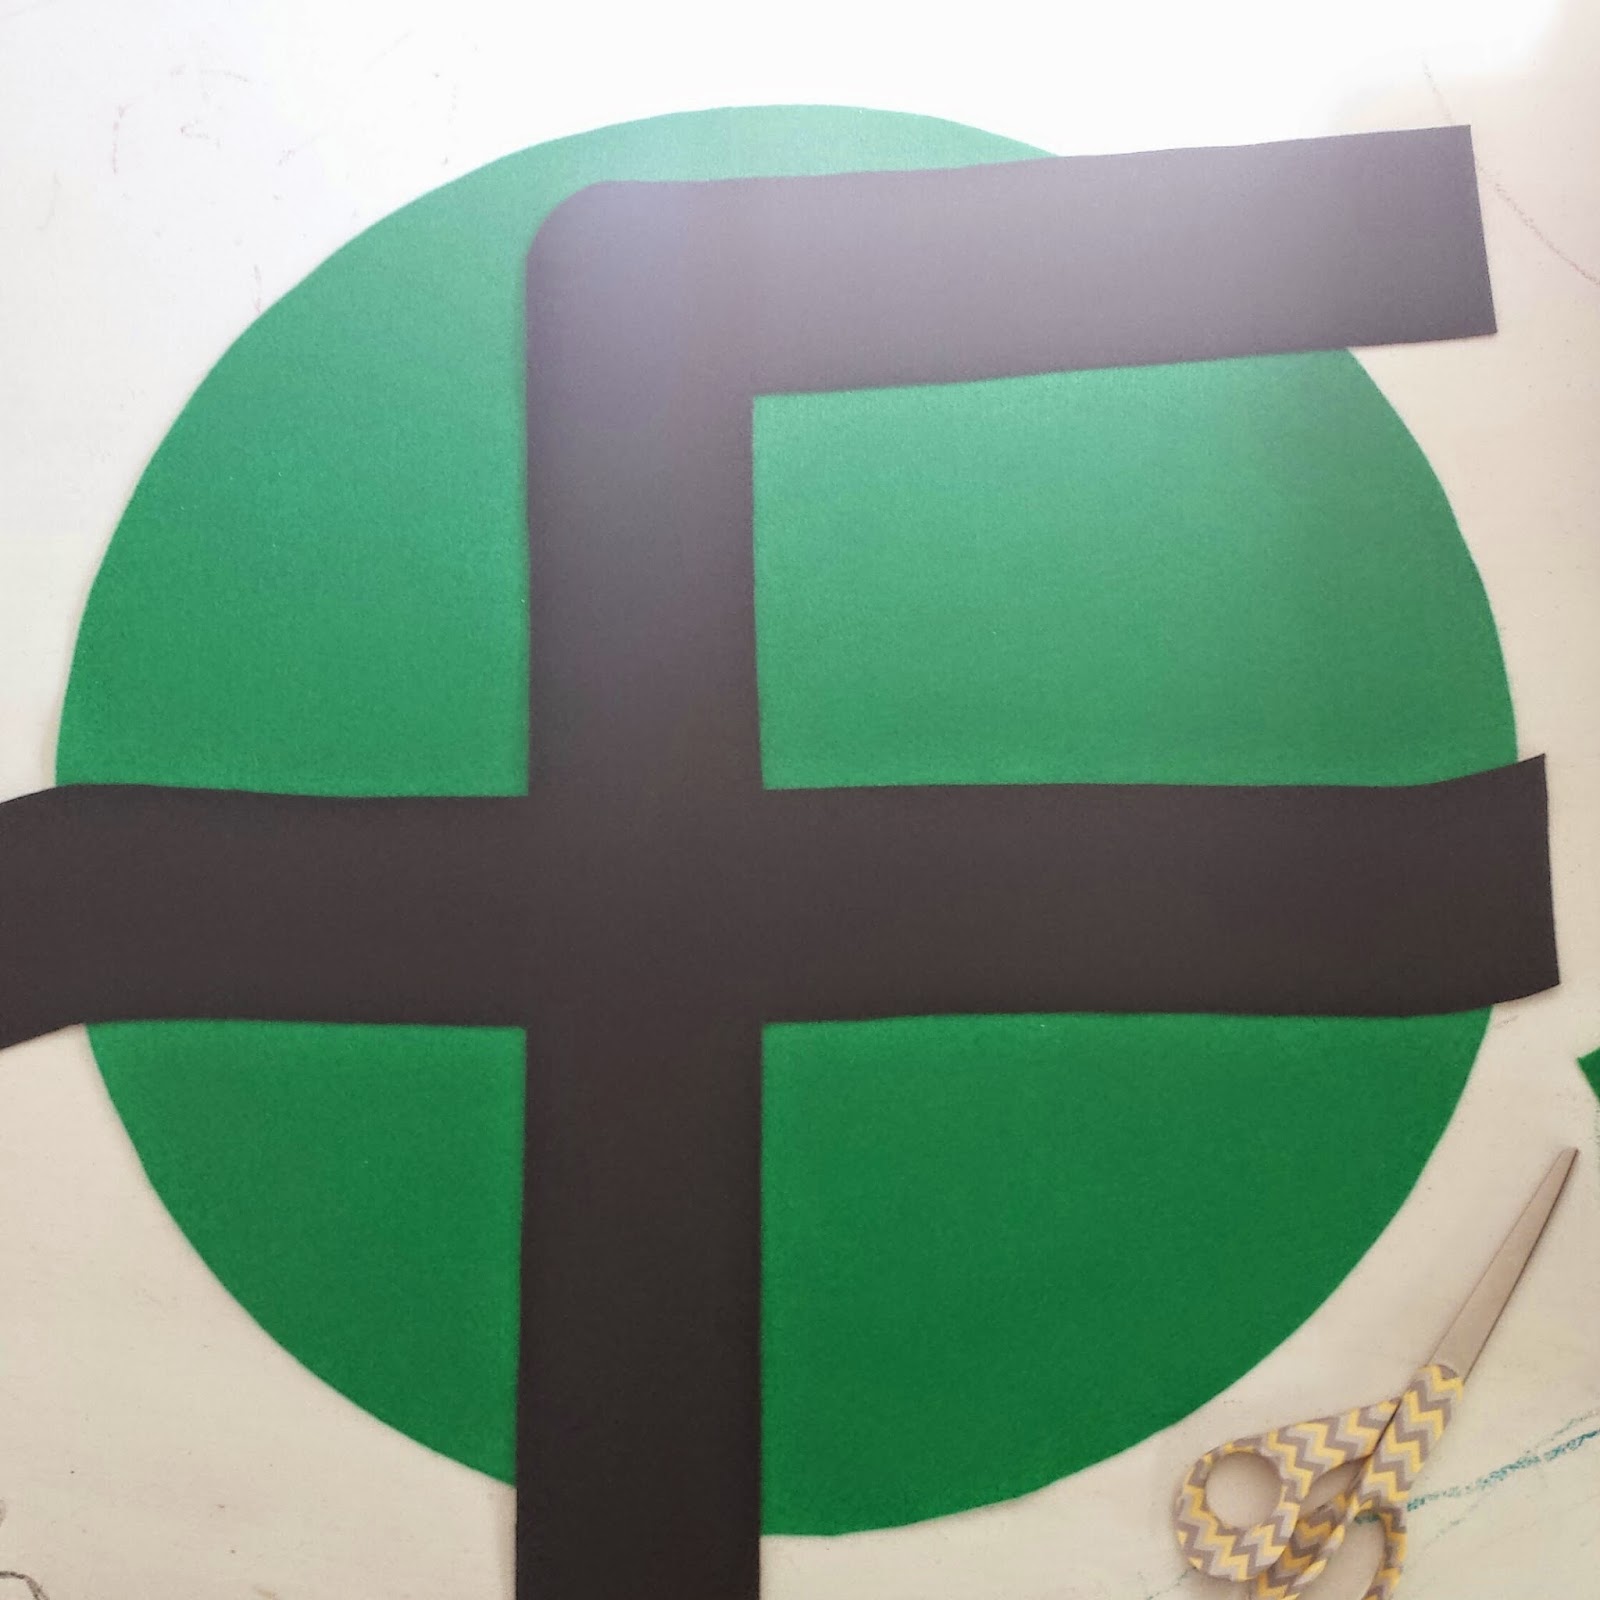
I'm more of an on-the-go doer, and didn't plan the entire design upfront. So when I created the roads for the play mat, they were originally for a full 2' square before I cut it down to the 21" circle. So the roads that were curving... only look like they are starting to turn near the edge of the circle. I ended up trimming one, but kept the other. For future projects, I'll be keeping to straight lines and actual corners. It looks better that way.
It was pretty easy to make the road. I just tapped a few pieces of paper together and used a ruler to draw the lines. I made sure the roads were wide enough for two cars to drive down. I just used a bowl to trace the corner.
For the flowers, I created wet-felted balls in various colors and sizes. It was my first attempt at wet felting and I'm pleased with the way they came out!
She mentioned that she liked the "grass" trim she saw on some of my other felt play mats. She said the play mat would be used by 3 year olds, so with that in mind I glued the yarn to the felt with fabric glue
I set up the felt balls on little green cut outs that were supposed to be leaves. I simply cut out 1" squares and then trimmed them down to four leaves.
I stitched the felt balls onto the leaves using embroidery thread
I created a dirt mound using cobblestone embossed felt
Then I added two driveways and flower beds. The driveways are the perfect size for matchbox cars. The area around the driveways was a bit small, but we were able to create two "houses" using blocks next to the driveways. So it worked out. The alternative would have been to put the lake where the driveways were, but she had asked for the lake to be in the middle. There's enough room next to the lake for more block houses.
So for the flowers, I stitched them through the felt, but I didn't think tying them off would have been a strong enough hold. I glued the underside of the flowers to the felt, and then I cut the threads to about an inch on the back. I folded them into a circle directly under the flowers and glued them in place. Always be sure to let the glue set for at least 12 hours (24 preferably) before moving anything around.
So for the mound, I had originally sewn a pouch for the poly-pellets. However, right before I sewed the back to the mat, I unstitched the mound and pulled the pouch out. Why? Because the pouch was restricting the pellets from fully moving around. I probably could have made a larger pouch, but the stitching was close enough that I don't think any pellets will pop out. I much prefer the change.
The hardest part was being patient for all the glue to dry. Gluing the grass to the underside of the streets was a bit time consuming, but sewing through it was harder. It wasn't too bad though, so I'll probably do it again.
I really like the way it came out!
The mound isn't too tall, mainly because if it had been filled any more, the play mat wouldn't have laid flat. However, it's plenty big enough for some construction trucks to drive around on it.
I did trim the grass a 1/2". It was looking a little wild before. There is a sandy brown area around the lake, and grass around the lake. There's a small cleared patch, too, for swimmers.
And it wasn't part of the play mat purchase, but I added a couple of sewn felt rocks (6 colors, 3 shades of grey and 3 shades of brown) and needle felted logs. There's even a hollow log for animals to hide in! I always add a little something extra to my Etsy orders. I think it's a nice surprise and hopefully no one minds. :) This play mat was meant for a preschool classroom, so I think the rocks and logs will add to the fun of playing with it!
Feel free to visit our Etsy store if you ever want us to create a custom order for you!
No comments:
Post a Comment