Saturday, July 19, 2014

HomeSchoolPiano Review


We received a lifetime subscription to HomeSchoolPiano to review. The lifetime subscription covers up to five students and gave us access to HomeSchoolPiano's Complete Set of Books. This is a product for all ages. My 3 year old and 4 1/2 year old have both watched the videos and practiced playing the piano keyboard. 
A bit about HomeSchoolPiano:
Willie Myette is a graduate of Berklee College of Music and has toured the US and Europe as a clinician and performer. He began JazzKids in 1996, which has grown to be a program used by hundreds of teachers around the globe. The JazzKids books and workshops have taught children as young as six years old how to improvise and play their own music. PianoWithWillie.com was founded in 2007 and has been used by thousands of students. Now with HomeSchoolPiano, parents can teach their students from the comfort of their own home how to play the piano using Willie's methods!
There are three books in the set along with the core book, which teaches a beginner everything they need to know to begin learning about how to play the piano. HomeSchoolPiano strives to "teach you how to become a fully expressive piano player who is as comfortable creating music as you are reading music." You will learn how to read, compose and perform your own music! With your purchase, you will receive instant access to the online lessons. All you need is an internet connection and a phone, tablet or computer to watch the videos on. It is recommended that you use a full-size keyboard or piano with this program. Each unit consists of seven lessons and the videos are up to ten minutes long. Students can work at their own pace while watching the videos and practice afterwards. 
The website is easy to navigate and once you are signed in, it remembers which lesson you used last. We have slowly been making our way through the introduction videos (CorePiano) and have watched some lessons from Book One. 

You can easily pause, rewind, fast-forward and play the videos.
You can find the length of the video at the bottom.

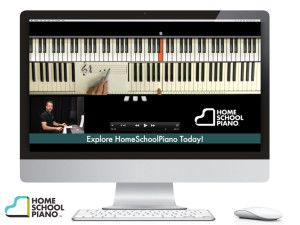
The videos are set-up so that you can see the teacher playing the piano and speaking to the camera in the lower left hand corner. Any available downloads to supplement the lessons are at the bottom of the video (video, audio, mp3, etc.). A top view of the instructor playing the piano is in the direct center and above that is a digital piano, which shows the keys being played in bright orange with the name of the note above it. 


If you are looking for a piano teacher for the visual learner, then Homeschool Piano is perfect for your child. The videos are also great for students who need to watch something several times before they have it, because you can pause it, rewind, rewatch, whatever you need. I am one of those learners and if I was learning to play piano with an instructor, I would feel too awkward to ask them to go over it again. So a program like this is perfect for those shy students. Visual learners will love seeing and hearing the piano being played right before their eyes! Auditory learners will also benefit from the style of these lessons, based on how the video plays out. The lessons teach you to hear and recognize the sounds of the notes being played.

Homeschool Piano Review

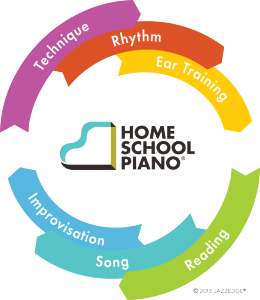
The HomeSchoolPiano Method: Technique, Rhythm, Ear Training, Reading, Song and Improvisation. This six-step cycle has been tested and makes it easier for children to learn the piano faster. You will learn proper technique right from the beginning and you will be shown how to develop speed and dexterity. Rhythm is the "engine" that drives music and this program uses a unique vocalization process. You will be taught ear-training exercises to learn rhythm, melody, and harmony, which will improve your performances and improvisation. You will be taught how to read music using sight reading practices, which will make it easier to compose your own music. The songs they use are original and do not sound like exercises, so you'll be having fun playing while you learn! And finally, the last skill they teach is the most important one: improvisation. You will learn how to let your creativity soar and be able to create your own music!

There are also tests that go along with the unit lessons. Here are a few examples of how the tests look. They often only show a handful of questions and you can readily check your answers. Correct answers will be marked off with blue and incorrect with red. You can opt to show the correct answers, that you can see where you made your mistakes.


Each book also comes with a downloadable pdf book. You can view it online or you can print it out. We printed ours out and hole-punched one side and arranged them in order in a 3-ring binder. The kids haven't used it much, but they enjoy using it to match the notes and name them using small pieces of felt that I designed.
Homeschool Piano Review

While this piano program was created with homeschool students in mind, I believe students in public school or even adults would benefit from these videos. My own children will likely take a break from it for the remainder of the summer (due to vacations and mostly being out of the house). But we intend to revisit this program at the start of the new school year!
Homeschool Piano Review

So here is the one big improvement I think HomeSchoolPiano should do to make this product even better - make an app for it! Why make an app for it when there are other piano apps available? Well, there are tons of piano apps out there. However, most only teach you certain songs, and some are not designed well and barely work, while others are just not kid-friendly (such as a million and one pop-up ads). We have tried out a couple and there's only one that we found that pairs well with this program. It is just a basic piano and the keys light up and display the name of the key (similar to the HomeSchoolPiano videos). It does have songs that you can learn, but we did not use that feature much. My daughter used this app alongside the HomeSchoolPiano lessons so that she could watch the videos on our computer or laptop and use the app on the tablet. While it is not a full-sized keyboard or piano, it definitely kept her attentive and interested in the videos. She was able to use the videos and app independently. When we tried to set her up with the videos on our laptop and the keyboard on the table in front of it, she became intimidated and did not want to have anything to do with it.

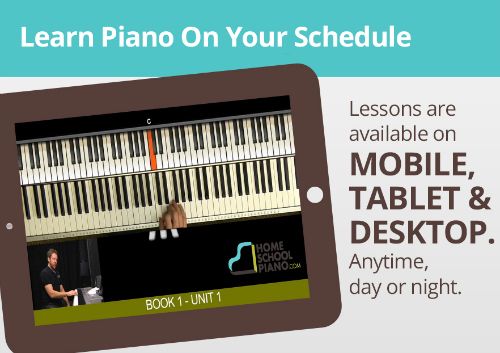
So, why should HomeSchoolPiano create their own app? A) It would be designed to work specifically with the HomeSchoolPiano lessons. B) While you can watch the videos on your phone or tablet while you are on-the-go, you are unable to practice what you learn. With an app, you would basically have a mini piano in your pocket. You can freestyle play or practice specific songs whenever you want. C) It would make lessons easier for homeschoolers who have multiple children, that way everyone can watch the videos on a computer/laptop and practice together or on their own, meaning one child could use the piano app while another uses a real piano/keyboard.

So how much is it worth? Considering what most parents pay for a piano tutor, it isn't much at all. They have two payment options, and both give you a lifetime subscription! How amazing is that? You can use this program with up to five students and it doesn't matter their age or what level of piano instruction they are at, they can begin wherever they need. And if other subjects, vacation, or life is hectic and they need to take a break, they don't have to ever worry about their subscription running out or that they have to cram through the lessons faster than they can properly learn them. They can return when they are ready to begin again.

Option One
Success Package (One payment of $299): Unlimited life-time access to HomeSchoolPiano along with all bonuses (downloads, jam tracks, sheet music) for up to 5 students.

Option Two
Payment Plan (Payments of $99.97 per month for three months): Unlimited life-time access to HomeSchoolPiano along with all bonuses (downloads, jam tracks, sheet music) for up to 5 students.

Try out the Free Lessons before deciding if HomeSchoolPiano is right for your children! Be sure to also check out the JazzEdge Network, which includes Willie Myette's jazz education, performances, and other educational resources.

Social Media Links:

If you would like to read other reviews on HomeSchoolPiano from the TOS Crew, click the banner below!

Click to read Crew Reviews
Crew Disclaimer

Wednesday, July 16, 2014

Pom Pom Sensory Bin


Disclosure: This post contains affiliate links. Thank you for your support!

Today's Toddler Series theme is Pom Poms! Pom poms are seriously awesome and so much fun to play with! You can make pom poms out of yarn (YouTube tutorial) or you can use store bought Pom Poms. Since young toddlers often put things in their mouth, I'd suggest holding off on introducing them to homemade yarn pom poms, just in case a strand comes lose. However, if they are past that stage, feel free to let them help you make a couple pom poms! They are super cute and fun to make!

We used regular store bought pom poms simply because our dog, Kaede, is notorious for making off with our homemade pom poms... She meticulously pulls out each strand one by one...

We filled the bottom of a sensory bin with small and medium sized pom poms. We added tubes (aluminum foil rolls and toilet paper rolls), small ice cube trays, large plastic tweezers, and medium and large sized Easter eggs.

My kids love simple sensory bins like this! They are perfect for quiet time play, like before or after nap time when toddlers need some relaxation. Or if you are homeschoolers and have a little one, a sensory bin like this might keep them busy while you are working with an older child.

The tubes are fun to stuff full of pom poms and to watch them disappear through them and fall out the bottom.


You can use the ice cube tray for cooking, as Munchkin did, or use it to match pom pom colors. Fill one side with pom poms of different colors and then ask them to fill the opposite side with the matching color (or shade if you want to challenge them).

Bean loved playing with the paper tubes and created a little tower and "pom shoot".


Munchkin really liked filling the eggs with pom poms and then working out his fine motor skills by closing them.


Even though Munchkin is almost 3 and Bean is 4 1/2, they both still love sensory bins like this! It kept them busy for over half and hour and they have asked for it several times since. 

For an older toddler, you could also add some colorful pipe cleaners. This way they can use them to create little critters, like black and yellow bumble bees, or pretty butterflies! My kids usually want to make dogs and cats. We did not add any this time because we somehow worked our way through our stash of pipe cleaners... Whoops! Time to restock. :)

Be sure to stop by Suzy Homeschooler's to see her Motor Activities Using Pom Poms!


Monday, July 14, 2014

How to Make a Felt Teepee


Disclosure: This post contains affiliate links. Thank you for your support!

We will be working through some American history this year, from a preschool-kindergarten perspective. Most of the learning will be from reading living books, playing with themed small worlds and sensory bins (Safari Ltd. TOOBS will definitely be used!), along with many hands-on activities and crafts. For the past month we have been working on our first month-long unit study! To begin American history, we definitely had to start with Native Americans. I have always loved learning about their beliefs, culture and history. We have a few relatives who are Native American, but they live on the other side of the country and sadly we have been unable to visit them in years (kinda hard to drive that far with two little ones). However, I have many great memories of spending summers with them, sleeping in tipis, going to Pow-Wows and watching Sun Dances (I was too young to participate). I used to listen to the Medicine Man tell stories and teach me about plants and how they were used for ceremonies and healing. During one of the ceremonies, it began raining and the Medicine Man parted the rain out of the circle. It sounds crazy, but it actually happened. Even my dad was shocked and we were just talking about it the other day. It was truly wonderful and I hope my children will be able to share similar experiences some day. 

In order to teach my children about Native American history, I wanted to make them some felt creations that they could use for small world play. Since I have actual experience living in a tipi (or tepee or teepee, however you want to spell it), I knew that was where I wanted to begin. I looked at old pictures of the tipi I stayed in and decided to model my felt tipi after them. The only part I left out was the door flap, because it's summer time. However I will likely add a flap that can be rolled up or folded over in the future. 

To make a tipi you will need:
Felt - I used cream colored felt
Thread - Ecru and brown colored DMC Embroidery Floss
Embroidery Needle
Sharp Scissors - fabric scissors work best
Disappearing Ink Pen - for tracing pattern
Fabric Markers (optional) 
Watercolor Paints (optional) 
Bamboo Skewers - for the lodge poles 
Paper and pen/pencil for tracing pattern

I began by tracing a large circle on thick paper (easier to use as a template for tracing). I did not want to make the tipis too big, because they are made out of felt and I wanted them to be stable and able to stand on their own. Then I cut out the circle and folded it into quarters.


I drew three circles of the same size along one of the folds. The circle in the middle will be the top of the tipi where the smoke escapes from. The circles on the ends will be the two sides of the opening to get in and out of the tipi. You can customize the size of the tipi to fit your needs. We made them kind of small, but we will likely make larger ones in the future. The small tipis fit two Safari Ltd Powhatan Indians TOOB figures comfortably (standing or laying down). Tipis typically could house a whole family.


Fold the template in half, along the line of small circles and cut out the small circles. Then you can use that as your template, or you can trace that onto another piece of paper. It should look like the picture below.


Trace the pattern on your felt and cut it out. If you use a disappearing ink pen the trace lines will fade.


Felt usually has a soft side and a rough side, so I made sure the soft side was on the inside of the tipi and the rough side was on the outside (easier for painting). It should look like this when it is standing up (below).


You can whip stitch or blanket stitch the edges of the tipi (use thread that matches the color of the felt). Stay close to the edge, but not close enough that the stitches will pull out.


Then add your wooden lacing pin details with a brown thread. You can either whip stitch them (like below) for an easier design, or if you scroll down, you can see on the tipi with triangles, how I stitched them to look more like wooden lacing pins.


I made three teepees (tipis, tepees), all with different patterns. One we kept relatively plain and the others we decorated using watercolors. Yep, you heard that right. Watercolors. We used Faber-Castell Watercolors, because they are seriously the BEST. We tested them out on wood too and in both cases they worked great! Just be sure not to use a lot of water and paint carefully. The paint will bleed out if it is too moist, because felt is incredibly fibrous and it will spread like wildfire. So take your time. Maybe even test it out on a piece of scrap felt before attempting it. The effects were exactly what we were hoping for! The paint is flexible and nothing peels off, although it is slightly stiff, but honestly that's a good thing! I let them dry overnight before I let the kids play with them.

I tested the watercolors and fabric markers on a piece of scrap felt before attempting to paint the teepees. The red and orange are watercolors. In the middle is what black fabric marker (Tee Juice) looks like. I found that the marker ink seeped into the felt and while it was dark on the other side, it looked grayer on the front side. 


We created our own patterns using colors that were symbolic to Native Americans. I tried to keep them more to the theme, but for the most part I asked the kids what kind of pattern they wanted and did my best to make it work. You can use a disappearing ink pen to draw a pattern first, if you want. We used a black fabric marker to mark a few lines that we intended to paint over with black paint after. And you should be aware that anything you paint will end up folding up into a cone shape, so don't be like me and paint an off-center circle around the top. :)


This is the pattern that Munchkin had requested: "lots of triangles and dots!" He also chose a red, black, orange and yellow color scheme. The two detailed tipis have their smoke flaps sewn open. I simply folded them over and line stitched along the fold.


You can glue the lodge poles to the felt using Elmer's Craft Bond Glue (it's flexible and durable) if you want it to be permanent, but we chose not to. This way the kids can pretend to take down the tipi and pack it up for travel. I kept the pointed ends of the lodge poles on the bottom, so they can easily press them into dirt or play dough, whatever medium they are using for a surface of their small worlds. You can just as easily cut off the tips so that no one accidentally pokes themselves.


Bean's teepee is the one with the yellow base. She had wanted a buffalo and a "man with a shield". She drew out the pictures on paper using crayons and I did my best to copy her art on the felt.


Here's a little small world Bean set up the morning after I finished making them (before I measured and cut the lodge poles). I love that they are so sturdy! And they were a great addition to our unit study and small world play.

Wednesday, July 9, 2014

WriteShop Review


WriteShop is an incremental writing program for children that inspires them to become successful writers! They offer resources for children in grades Kindergarten through High School and materials for teachers and homeschooling parents. We had the opportunity to review WriteShop Primary: Book A Set, which is the first book in their Primary set. The A-C set is ideal for children ages 5-9, or K-3. WriteShop also offers Junior sets D-E, which is for grades 4-6, or 9-11 year olds. 

WriteShop Review

The student book consists of 25 pages, and the teacher guide consists of 186 pages.The physical version is a soft-cover book with plastic-coil binding that lies flat. You can purchase the Activity Set Worksheet Pack separately and choose the print or E-book version. Our Teacher Guide and Activity Pack were both E-book versions. You would need to print off the students pages, and you could use a tablet or computer/laptop for the teacher's book (or print that as well).

WriteShop Primary was developed for children grades K-3 and for parents to work closely with their children. This writing program is flexible and easily accommodates to your child's needs. So if they need more review or they want a more challenging activity, you can do that. Each book was developed to work together, but if your child is more advanced, you can start at a later book. Book A introduces several writing concepts that you will see develop through the rest of the Primary sets as your child learns more.

WriteShop Review

Price: $29.95

Since we are still in the beginning stages of reading and writing, Book A was perfect for our starting point. We used this product mostly for oral lessons and I wrote down their answers. Bean watching closely while I wrote down words, and would copy words new words onto her dry-erase board or ask me to tell her what the word said. She would then sound out the syllables and practice writing the word. We add "learned words" to our writing journal afterwards with a simple sentence example of how the word is used.


WriteShop Review

Book A is recommended for children in kindergarten or first grade and works well with pre-writers, beginning and developing writers. My son is at the pre-writing stage and my daughter is in the beginning stage. The lessons teach simple writing processes that are engaging and include various creative activities, such as crafts and working with picture books. There is no pressure on the child to write immediately and you can take your time working on oral lessons and then work up to writing lessons as they become more familiar and comfortable with their own writing progress. We supplement our literacy activities with reading and spelling curriculums, but so far my children are not comfortable writing sentences. My daughter writes letters and occasionally short words, while my son only writes a handful of letters and numbers. We will continue using this curriculum and will re-start from the beginning when they are more proficient writers, before moving on to the next level.

Because fine motor skills are important to developing the skills to become proficient writers, we always started our lessons with a fine motor busy bag (lacing shapes, spools and marbles, sewing shapes, and a few others). They are not necessary for this product, but we found them to be a relaxing exercise that worked on their fine motor skills. This helps them learn how to hold a pencil correctly and works out their muscles and improves their grip.

You can customize your lesson schedule to accommodate your child's grade or skill level. The lessons are divided into 8 activities that work at the pace of the child, so there is no pressure for the child. We really love that this writing curriculum does not force the child to learn faster than their comprehension can keep up. Each set includes a guided writing practice and sets 2-8 include an activity or project. The activity sets are broken down as so (below) and gradually become harder and include a final set that more advanced writers will appreciate.

We do not spend a set amount of time on any of the activities. If they want to cut a lesson short or work on it longer, I go along with them. Since my children see me writing often, they love sitting beside me and work on their own writing activities. I go over everything with them and help them step-by-step. Bean is incredibly independent, so as soon as I am done explaining and showing her examples, she starts off on her own. I can tell when she is struggling, so I'm able to assist her, despite the fact that she rarely ever actually asks for help. Bean mainly enjoys writing about superhero adventures that she goes on with her brother and retelling her dreams.

Set A focuses on personal writing, choosing topics and titles, understanding beginning, middle and end, as well as sequence of events, along with punctuation, introduction to rhymes, organizing ideas and writing about personal experiences. This product also teaches young writers about punctuation marks, recognizing words that rhyme and using a capital letter at the beginning of the sentence. 

This was a really great product to introduce them to the world of writing stories and we will definitely continue using it for creative writing exercises. We were able to use this product to begin brainstorming before writing down stories, which Bean really liked! Whenever we were writing about a specific theme, we would research it first and write down key notes and interesting facts. Then we used those as either inspiration or simply to add artwork to their story. Sometimes we even typed up and printed the stories on fancy paper, laminated them and created small books. We have only made two so far, but I know we will make many more! 

This is the page Munchkin mostly worked with. He usually prefers to trace letters and rarely writes them on his own. To save on printing costs, we use our sheets in dry-erase sleeves or laminate them, this way they can be reused. This is perfect for beginning writers, because they will need the practice and they will often ask to revisit the activities they enjoyed most.


Pages like this one is where I did most of the writing. I'd have my children dictate and I'd write what they said on the train lines. This is one page you will have to print several copies of. I laminated and cut out each section of the train. I have one solid page that I use for my own writing, while all of their train pieces are used for their writing. The My Story Train is perfect for short stories and we use this train often for storytelling activities, in which Bean comes up with a story or recounts an adventure she went on and has to write it down. 


Pages like the one below is laminated and the pieces are cut out and stored in an envelope that is attached to the back of the page. There are Velcro dots on the back of the pieces and on the page were the pieces go. The kids color in the creatures first, and then place the pieces where they belong.


This is another page that is laminated with an attached envelope for pieces. We have a set of flash cards that work on order of events, so they were familiar with the idea. You can tell the story pieces apart because of the shape around the sentence, this way children are less confused and can easily find the matching pieces. I really wish there had been extra pages like this one, because my kids especially enjoyed this activity. We might eventually make our own story order pieces.  


As far as writing curriculums go, we found WriteShop's A set to be creative and engaging, which is what we look for in the curriculum we want to use. The Teacher Guide was especially helpful and really gave a lot of information to work with and encouraging ideas to engage young writer's. This writing program has inspired my daughter to become a storyteller and now she is constantly telling me detailed stories and asking me to write them down for her. She is becoming increasingly interested in creative writing, which makes me so happy!

Did we enjoy this product? Yes, we did! At first we were unsure of how much we would like it, because the first week neither of my children wanted to use it. Gradually we were able to find ways that made it appeal to them and now they love it! I would definitely recommend this product to homeschoolers who want to teach creative writing to their children. This is a product that would work great for a child who enjoys coming up with their own unique stories, because this would teach them ways to write it down. 

Be sure to stop by WriteShop's social media pages!


If you would like to read other WriteShop reviews from the TOS Crew, click on the banner below!

Click to read Crew Reviews

Crew Disclaimer

If you enjoyed this post, follow along with us on Facebook and Pinterest or subscribe by email or Bloglovin'!
Related Posts Plugin for WordPress, Blogger...